The fifth and final video in the series: Christmas Crafting With Dollar Tree is here!
Make some pretty and sparkly trees for Christmas decorating with Dollar Tree supplies. Make it fast, easy and cheap.
4. Add gems using additional adhesive. Note, if you chose to add some sparkles on top of the glitter that you will have success by using another wet type of glue.
5. Glue to a candle holder.
Easy peasy and cheap! Make a bunch for yourself and to give as gifts. Have fun.
Thanks for stopping by!
** note I was compensated for this post. This post also contains affiliate links and I will be compensated if you make a purchase after clicking on my links.
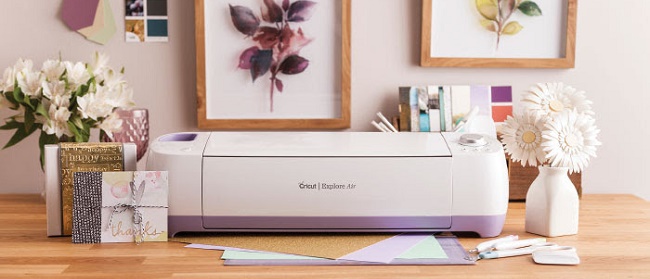
Save money by purchasing your craft and card making supplies at Dollar Tree ! That's right you can find blank cards, papers, embellishments, adhesives and more at your favourite dollar store, save money and make more cards! Or, buy a box of the ready-made cards like I do, you get so many for so little...and turn these ready-made simple cards into some beautiful with a handmade touch card!
Next using scissors that can cut fine details cut out all the elements you like from a second card.
Select which elements you wish to enhance. Use dimensional foam adhesives to attach said pieces onto another card by layering over the same image or letters.
Another step is to add glitter to specific areas to add some interest.
Thirdly, think about using the design of the card itself to influence how you can add to its appearance. For example, in this situation, I chose to wrap some embroidery thread in and around the letter "O" in the word season before sticking it down with the dimensional foam adhesive.
** note I was compensated for this post. This post also contains affiliate links and I will be compensated if you make a purchase after clicking on my links.
The 3rd project in the series: Christmas Crafting with Dollar Tree is all about making easy and inexpensive wreaths to decorate for the holidays. See how easy it is to make a glamorous looking piece of decor for your home for little money, in no time.
(*Sponsored post with affiliate links)
All the supplies used in making this project were bought at a Dollar Tree and several are available online at Dollar Tree.com.
** note I was compensated for this post. This post also contains affiliate links and I will be compensated if you make a purchase after clicking on my links.
See the Video:
Directions: 1. Fluff the wreath by spreading out the branches
2. Pull the flowers off the stems.
3. Attach the ornament to one of the branches of the wreath, secure with glue
4. Glue the flowers to the wreath
Make several of these wreaths in a variety of colours to decorate your home and also to give as gifts. Find everything you need at Dollar Tree.
Thank you for stopping by. Please leave any comments below.
The third bag was made using materials supplied with the NEW Cricut Easy Press™2. Included was the canvas bag and the Glitter Iron On from Cricut.
Note that each type of iron material requires its own temperature setting on the easy press. Please, take the time to read the suggested heat levels included with each product. Use caution when working with any iron or heat press, and work on a protected heat resistant surface as the heat can melt many surfaces. In the video you can see how a Cricut brand EasyPress mat was used.
Thank you for stopping by. Please, leave any comments in the section below. Stay crafty.
See how easy and inexpensive it is to make Christmas Decorations with supplies bought at Dollar Tree!and other dollar stores! View the second in the series: Christmas Crafting at Dollar Tree.
Check out the wall decoration that was made with a charger plate from the Dollar Tree! Purchase one like this in store or online here at Dollar Tree .com! ** note I was compensated for this post. This post also contains affiliate links and I will be compensated if you make a purchase after clicking on my links.
All the supplies used in the making of this project come from Dollar Tree! Well, with the exception of the glue gun which is from Ad Tech!
To assemble:
1. Glue floral stems to top of charger plate.
2. Add stickers
3. Glue picture hanger to the back
Watch the video!
***Please use caution when using hot glue. Wear protective finger caps if possible. Also, keep a bowl of cool water nearby just in case you need to dip your fingers. It will feel better than the hot glue!
Thank you so very much for checking out this blog post and the video. Please, leave comments in the section below. Have fun crafting!
In no time the Holidays will be here so here's a craft to help you with all that planning, and it's affordable too as you can find all the materials at your Dollar Tree and even online at DollarTree.com.
To make this I used a small binder with a polyvinyl cover measuring 7" x 9".
The inside has dividers made of sheets of poster board in gold, silver, and white, and decorated with a variety of Holiday Themed stickers.
The adhesive and hole puncher is also available at Dollar Tree. The only other item I used is my label maker to make the labels on each divider page.
See the video.
I hope that you are inspired to get crafty for the Holidays, and enjoy all the activities with less stress because you will have a handy-dandy planner to help you!
Stay tuned for more Crafting at the Tree for Christmas here and on my Youtube channel!
In upcoming posts and videos, I will share some decorating and gift giving ideas. All of them affordable, all of them from The Dollar Tree!
Thank you so very much for stopping by, please leave any comments and questions below in the comment section. Bye for now and Stay Crafty!
** I was compensated for tis post. This post also contains affiliate liks and I will be compensated if you make a purchase after clicking on my links.**
Hello, and almost Happy Halloween to you all! Today I have some Cricut® (Sponsored) Made DIY Halloween crafts to share with you that I used to create this Halloween Porch Scape or Front Entrance Decor. I hope you like.
To create this Handmade Halloween Decor I used several props from the Dollar store as a base. I then made the rest of the parts with my Cricut Maker™. I had fun using a variety of cutting materials and accessories.
Cricut Maker™, "The Ultimate Smart Cutting Machine." Can be used with a variety of tools and cuts several types of materials.
To begin, take a look at the Halloween Cat Pumpkins I made with Dollar Store carvable foam pumpkins!
After the paint was dry, and the tattoo applied I cut some slits into the top sides of each pumpkin using the Scoring Wheel Housing and Wheel for Maker™ "Cricut™", and inserted each Cat ear. I also used some hot glue to secure each ear in place.