Wednesday, May 24, 2017

Show off Your Pride and Patriotism With Your Pet

Show off your Love for your country and your pet with a few items from the Dollar Tree (Sponsored Post), and about 15 minutes of time to make a Patriotic Pet Project.


** I was compensated for this post.  This post also contains affiliate links for which I will be compensated if you make a purchase after clicking on my links.

For my friends to the south, please feel free to substitute some materials that are more in line with your country's flag and colors.

Here is what you will need to make a similar cat collar.

Sheer ribbon rolls in white, and red (and blue as an option)
Cat collar in color of your choosing (e.g., red, white, blue)
Shoelaces with country's flag (in store only)

Video Here


Directions.

1. Cut the ribbons and laces into 8 inch long pieces.  I cut about ten pieces of each ribbon and lace.  I recommend measuring around the cat's neck to see what collar size would fit best. Use more or fewer strands as desired.

2. To keep tips from fraying you can add some "Fray Check" or clear nail polish, or even glue to cut edges.

3. Tie each piece of ribbon and lace to a collar, alternating colors as you go.

**Warning, this is intended as a decorative piece for your pet to wear for a short period. Do not leave your pet unattended with this collar for too long.


Shop Patriotic Party Supplies at DollarTree.com (The US only)and for more celebrating and decorating remember to check out your local Dollar Trees!(Everyone)


Saturday, May 20, 2017

Craft Room Tour Part 2 for 2017

Here are the second video and post about my favorite space.  I work and craft here for fun almost on a daily basis.  View my many cheap or frugal organization systems I use for my art and craft supplies.


Get some ideas for your own space. I started off with a zero "0" budget and got to this point with perseverance, patience and a lot of hard work.  Mind you, I do work in the Crafts and Hobby Industry, and I do get a lot of supplies given to me.  However, before that happened I had to be very creative so I could get any supplies or tools.  I do know very well, what it means to make do with very little.  I also know that you do not need to own a lot of supplies to make great art or create fabulous crafts.

If you have any questions, please do not hesitate to ask.  I so appreciate all comments.

Thank you very much for stopping by, and for your continued support.

Friday, May 19, 2017

My Studio and Craft Room

Tour the space where I create, play, and work almost every day. View my many organizing systems, and get some ideas for your own area.  You can view a series of videos on Youtube that I am working on, and I will be adding more information over here on the blog.

Today, I have Part 1 of the series:


This week I talk mostly about some of my Fabric Storage systems as well.  I will include links to some of the products that are available still.  These are affiliate links and if you click on them AND make a purchase I will receive a small commission.   Thank you.


Shop Dollar Tree for all of your storage needs (For US only)


Dollar Tree Storage Plastic Slotted Baskets
Dollar Tree Plastic Storage Boxes with Lids
Dollar Tree Collapsible Storage bins (similar but smaller than above)
Clear Plastic Storage


Walmart.ca: Free Shipping on Qualifying Orders


Walmart.com For US onlyIntroducing FREE 2-Day Shipping at Walmart.com!

Learn how I used these Organizers to build my Cutting/crafting table here:http://annmakes.blogspot.com/2017/05/make-cutting-table.html


Make a Cutting Table

How to make a fantastic Fabric Cutting or Crafting Table on the cheap!
**I am including affiliate links in my post, so if you click on them to purchase anything from those sites, please know that I get a small commission.**


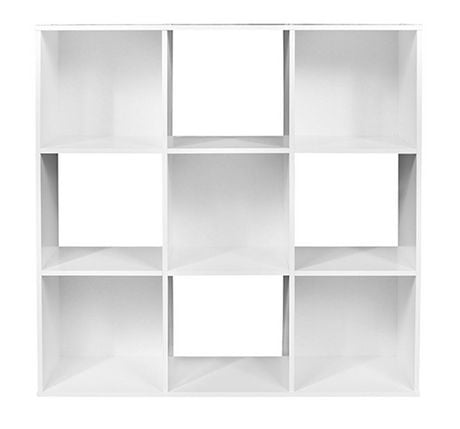
It all began with four "ClosetMaid" Cube Organizers from
Walmart.ca: Free Shipping on Qualifying Orders


Next came the assembly:

The setup plan:


Putting it all together:


icon
Topping off the bookcases with a 4'x 8', one inch thick, white melamine board from my local hardware store (Pont Masson) that overcharged for delivery!


Thursday, May 18, 2017

Mod Podge a Fabric Bowl and Banner

Make your own bowls and sturdy banners out of fabric with the help of Mod Podge®.  Today, I am sharing my project which I made as part of the Designer Crafts Connection (DCC) Blog Hop, where we are honoring Mod Podge's 50 Years!  We are all celebrating this product and the company for its long-standing presence in the Arts and Crafts industry. Visit the Plaid site or more information regarding their wide range of products here.   ****Enter to win prizes, For Us and Canada only****


Did you know that Mod Podge® works with Fabrics?   Well, now you do.  I was excited to receive these products from Plaid®. the Stiffy® product was new to me, but very exciting as I had never tried it before.  I am already familiar with most of Plaid's products, and I have loved using ALL their Mod Podge® formulas over the years.

To make a fabric bowl here is what you need:

Fabric (mine is from Nancy's Notions)
"Stiffy®" Fabric Stiffener from Plaid®
Thread (optional)                                                            
Sewing machine, or Serger/Overlock (optional)

                                                                       Link to video


1.  Select a piece of fabric, cut into a square, taking into consideration the size of the bowl you would like.


2. Cut the fabric into a circle.  There are many ways to do this.  I chose to use the Fiskars® Fabric Circle cutter tool (from Nancy's Notions®).  You can achieve similar results by using any plate or circle template, a pencil and scissors.


3,  I chose to make a rolled hem edge around the circle with myAmerican Home Serger (Nancy'sNotions®).  This is optional, and similar results can be achieved with the zig zag stitch on a regular sewing machine.  You may also just use pinking shears, or leave the edges as is.


4. Soak, or coat the fabric with the "Stiffy®".  Lay the circle over a form to allow it to harden into the shape desired.  Let dry over night.


To make the Banner here is what you need:
Pieces of denim
Pieces of print fabric
Pieces of a solid and contrasting colored fabric
Mod Podge® Decoupage Tracing Templates by Plaid®
Mod Podge® Matte by Plaid®
Mod Podge® Decoupage Brushes (Plaid®)
6 metal eyelets
Kitchen string

1. Place the scallop banner piece from the Mod Podge® Decoupage Tracing Templates.

2.  Place the letter Mod Podge® Decoupage Tracing Templates over the solid color fabric, and repeat.

3.  Measure rectangular pieces that will fit onto the denim pieces.


4.  Adhere the solid letters to the print pieces by brushing some Matte Mod Podge® to both fabrics, and stick together.

5.  Adhere the rectangles to each Denim Banner piece.

6.  Set two metal eyelets per banner.


7.  String the kitchen twine through the eyelets. Hang to decorate.

Remember to check out all of the beautiful and creative projects made by this most talented group.
Let us know what you will "Mod Podge"? Thank you so much for stopping by.


Monday, May 1, 2017

SNAP Conference 2017

Over a week ago I attended SNAP, a busy and fun conference for Bloggers  I had a great time seeing my old friends, making new ones, and learning new things.

Fellow AFCI Designer and SNAP attendee Cindy deRosier has such a great post on the conference here (http://www.cindyderosier.com/2017/04/snap-conference-2017-overview.html).  Check it out!

I arrived at SNAP one day before the event began, as I had a better choice of flights.  I was able to fly from Ottawa to Toronto, Canada with only a two-hour layover before my next flight to Salt Lake City.

My welcome at the Little America Hotel was pleasant as per last year, and I had a lovely room.  The next day the sun was shining after the night's rain, and I took a nice walk around the area.  I was so pleased to notice all the lovely flowers in the gardens, the green grass, and the trees full of leaves.  After all, Ottawa had just come out of winter, and we were all starving for that spring sunshine!

At noon I met up with fellow Cricut Bloggers/Brand Ambassadors to help with the booth's set up.  I got the noble task of unpacking and plugging all the shiny new Cricut machines.  Afterward,  I sewed, and sewed, and sewed hundreds of paper diamond banners for the backdrop of the booth (Thanks to Baby Lock and Nancy's Notions).  I still see those paper die cuts in my sleep!!!  LOL.


Later that evening, there was a Get Together of the Utah Sewing Bloggers at the Maker Space just outside Salt Lake City.   The event was organized by
Kimberly Parrett Coffin  from http://sweetredpoppy.com,  and sponsored by:


 Cricut™ and Canon were also there with fun Make n Takes.


There were refreshments, too many treats, gift bags, and prizes.  One of those prizes was won by yours truly!


I see my trip to SNAP as my second most expensive marketing investment after attending Creativation.  However, two years in a row,  I have personally found the return to be greater.  Each event is unique, and I cannot compare them adequately, AFCI events are more Trade and Industry concentrated, while SNAP is about Bloggers and Digital Content Creators.  SNAP is also, about Creative Entrepreneurs and Lifestyle Influencers (Cooking, Creating, Party Planning).


I attended "The Secrets of successful Brand Relationships" with Whitney Curtis of Home Depot, Cooper Monroe of Motherhood, and Karen Nolan of Lego.

Later I brushed up on my crochet skills with Bethany Dearden.  The next day I learned "How to Sew a Rag Quilt" with Nicole Schneider from Nancy's Notions.  I also won a New Serger from Baby Lock!
I enjoyed the first quilting class so much I attended the "T-shirts Quilts Made Easy" with Donna Parker also from Nancy's Notions.  On the last day I attended two more sewing classes: "Sewing Doll Clothes with Quick-Trace Templates", and "Turn Doodle Sketches Into Works of Art."

In between learning sessions I met with all of the sponsors as I visited their booths and participated in all their projects, or Make n Takes.

The sponsors of Snap included: Rust-Oleum, Spellbinders, Wagner, LEGO,Fresh Books, Darice, Canon, DecoArt, FloraCraft, Sherwin Williams, Cricut, Adobe, Nancy's Notions', Plaid, Polaroid, savings.com, Silhouette, Simplicity, Sizzix, The Motherhood, thermoweb, Kraft, Charmed, Cents of Style, DMC, Zaycon, adThrive, Michaels, Ryobi Nation, Expressions Vinyl, Get Away Today, Close tomyHeart, Oriental Trading, Swig, Amy Robinson, Timeless Treasures, Authentic Denim, OLFA, Wilmington Batiks, Ontrend, Lindt, Tailor, Clover.

I hope to share more projects that were influenced by all that  I learned while at SNAP in the future.  Stay tuned to my Blog and YouTube, for more.  Thanks for stopping by.
SaveSaveSaveSaveSaveSave