Sunday, July 16, 2017

Make a Back To School Homework Helper


                                                     ****Affiliate Links included in post****

Back To School season is in full swing!  Stores are getting their shelves stocked and ready for the massive onslaught of consumers who will want to buy everything their students need.  Many kiddos will want the latest and greatest regarding designs and styles for their brand new supplies.  All of this can add up to a significant expense, and headache for a lot of parents.  Then once school begins, the dreaded homework will slowly creep back into their lives as well.  Be ready this year by creating your own Homework Helper!


 If your kitchen table is THE place where everyone gathers to do their homework, then why not have one tote to coral ALL the supplies every one will need to finish their homework assignments in a flash and get the dinner table cleared off in the blink of an eye!

Begin by collecting some cardboard boxes, and gather some tools.  Something to cut the cardboard, and tape with, adhesive, and duct tape.  A marking tool is also useful.


Arrange the boxes into a working arrangement to create your caddy.  For this project, one long narrow box, two juice containers, and one shallow tray were used.

The next step is to cut down the boxes to size.  This will depend on the types of boxes you gather. Pleasantly arrange your receptacles, mark where things will go.  Make any adjustments necessary.

When you are confident where everything will go just begin taping all the sides of each box that you want to alter the look of.
                                                                                                                                                                    Adhere each component into the primary container.

Cover the entire outside area with duct tape.  Add two handles with the rope.  Finally, glue one long piece of string around the whole box.

View all the steps in the following video:


Many of my Crafty Friends are sharing 15 Minute How To's for Back To school this week, please check out their projects.


Thank you for stopping by.

List of some of the products shown and my ****affiliate links to DollarTree.com **** ( I will receive compensation from any purchases made through these links, thank you.)

1" Clear View Vinyl Binder =   http://bit.ly/2tkOMvS
100 Sheet  B& W Composition Notebook = http://bit.ly/2ttQY2P
100 Sheet Fashion Composition Notebook = http://bit.ly/2tkY374
70 Sheet Fashion Notebook = http://bit.ly/2tMe1bG
4 ct- Highlighters = http://bit.ly/2sQvnjb
Zipper Binder Pouch = http://bit.ly/2utO51Z
48 ct- crayons = http://bit.ly/2tQny0R


Wednesday, July 12, 2017

Cool Crafting in Summer with Cricut®

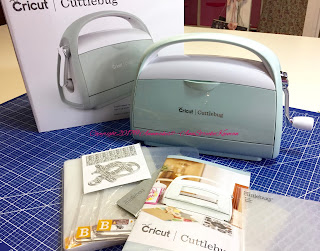
 It is summer it is hot, and we want to chill and craft yet.  So how can we have some fun and craft something beautiful?  My suggestion is to gather up some friends and play with the Cuttlebug.  Make Dragonflies, and Butterflies all the while enjoying being outdoors.


The Cricut Cuttlebug works without electricity is lightweight, and portable.  It is also a safe way to enjoy your paper crafting while enjoying the great outdoors.  If you are going camping or visiting an area that will not have adequate electricity, then the Cuttlebug will allow you to make some lovely paper crafts.  But wait!  The Cuttlebug can be used to die cut leather, fabric, aluminum, plastics, and some chipboards and thin woods!

                                         
Video Link


Make cute dimensional Dragonflies, and Butterflies from some paper and the Cuttlebug Die Cutting and Embossing System.


To make your own cute bugs try the Cricut Cuttlebug Up in the Sky Metal Cutting Die Set.


To make these, you will need to cut two layers for each Dragonfly, and Butterfly.


The Butterflies come in four sizes!


Apply some foam adhesive to the bottom Dragonfly, and Butterfly and glue the second with the bent wings over.


Add some glue to the back of a small decorative clothespin and attach the bug. Add some faux gems with more glue if you would like.


The Cuttlebug is a great companion to the Cricut Explore Air 2.  Both can die cut a variety of materials, wood, papers, chipboard, plastics, foils, felt, fabric, vinyl, etc. Combine projects made with both systems for some fantastic, and original projects.


Get more inspiration and project ideas by visiting the Cricut Design Space. Wouldn't this wreath look cute with the addition of some Butterflies?  Make it with your Cuttlebug and Cricut Explore Air2.  

SaveSaveSaveSave
This is a sponsored conversation written by me on behalf of Cricut. The opinions and text are all mine.

****The following are affiliate links which I receive a small commission from when any sales are made.   Thank you for your support.****

Monday, July 10, 2017

Cricut Prime Deal

Get a deal on Cricut Explore Air 2 during Amazon's Prime Day. Lasts for 30 hours only!


                           Get one while you can!  Get your Craft on, and have loads of fun!

                    Come back on Wednesday, for a NEW How To with Cricut.  Plus, Bonus video!
Affiliate link included (I receive a commission from any purchases, thank you.