In no time the Holidays will be here so here's a craft to help you with all that planning, and it's affordable too as you can find all the materials at your Dollar Tree and even online at DollarTree.com.
To make this I used a small binder with a polyvinyl cover measuring 7" x 9".
The inside has dividers made of sheets of poster board in gold, silver, and white, and decorated with a variety of Holiday Themed stickers.
The adhesive and hole puncher is also available at Dollar Tree. The only other item I used is my label maker to make the labels on each divider page.
See the video.
I hope that you are inspired to get crafty for the Holidays, and enjoy all the activities with less stress because you will have a handy-dandy planner to help you!
Stay tuned for more Crafting at the Tree for Christmas here and on my Youtube channel!
In upcoming posts and videos, I will share some decorating and gift giving ideas. All of them affordable, all of them from The Dollar Tree!
Thank you so very much for stopping by, please leave any comments and questions below in the comment section. Bye for now and Stay Crafty!
** I was compensated for tis post. This post also contains affiliate liks and I will be compensated if you make a purchase after clicking on my links.**
Hello, and almost Happy Halloween to you all! Today I have some Cricut® (Sponsored) Made DIY Halloween crafts to share with you that I used to create this Halloween Porch Scape or Front Entrance Decor. I hope you like.
To create this Handmade Halloween Decor I used several props from the Dollar store as a base. I then made the rest of the parts with my Cricut Maker™. I had fun using a variety of cutting materials and accessories.
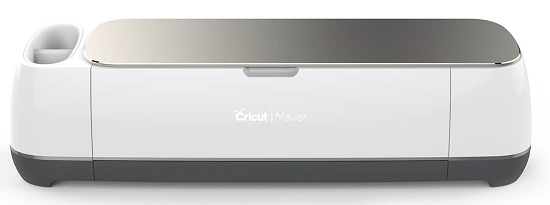
Cricut Maker™, "The Ultimate Smart Cutting Machine." Can be used with a variety of tools and cuts several types of materials.
To begin, take a look at the Halloween Cat Pumpkins I made with Dollar Store carvable foam pumpkins!
After the paint was dry, and the tattoo applied I cut some slits into the top sides of each pumpkin using the Scoring Wheel Housing and Wheel for Maker™ "Cricut™", and inserted each Cat ear. I also used some hot glue to secure each ear in place.
It's Hot Glue Tips time! that's right, check out all the fabulous Hot Glue Crafts that you can make with your Glue Gun and Sticks. It's fast, fun and easy. *Affiliate links included*
In this video I show you how easy it is to make your very own stencils, masks, and stamps for your crafting and art making needs with just your glue gun! I warn you it's easy and addictive. LOL. So just be careful when working with hot glue as it can burn your fingers. DON'T touch the hot glue or the tip of the Glue Gun when it is hot! Keep a bowl of cold water nearby just in case you do get glue on your skin, or wear protective fingers mitts. Trust me! Use adult supervision with children.
For more ideas and fun hacks check out my friends' NEW book they co-authored!
Click on the box above for more cute projects from this Hot crew of Crafters! Or follow this link:
http://www.30MinuteCrafts.com.
Thanks for stopping by and let me know what Hot Glue tips you have.
I use this glue Gun.
*Affiliate links pay me a small commission when you click and buy. Thank you!
Join me on September 29 and 30th at the In The MKNG Festival in Bethel Woods, New York. At the Bethel Woods Center For The Arts, at the historic site of the 1969 Woodstock Festival. That's right we're going to Woodstock! Get your Tie Dye on if you want and come to enjoy "Groovy" live music while you see and do "Cool" creative things. Come and Celebrate Creativity at its best along with artists, vendors, and "peace-loving" individuals! Bell Bottoms are optional! LOL.
If Mother nature abides this will coincide at the same time of year when the leaves change colours, and we can all be witnesses to what I refer to as "Mother Nature's Box of Crayons Display of Colour and Beauty"!
"In The MKNG" is THE Creativity FestivalNot to Miss!!! It's an event by the Association for Creative industries (AFCI).
There will be live music (See below), and a chance for you to meet and mingle with Celebrity Makers! (See Link)
You may want to check out the Lion Brand Yarn Zone and see "Dyed by Darrin," and the Tie Dye Pavillon where there will be the opportunity to have lots of fun. Come on it's Woodstock after all!
Makers come in all ages, so there's a Kid Zone at In The MKNG!
You won't want to miss out on the Michael's Make Zone for fun Make N Takes! Keep your eyes out for the Joann "You Can Do It Crew" on their bicycles handing out craft projects.
The Arts Hudson Technique Tent will have artists demonstrating amazing art-making techniques!
There's also going to be a Pet Zone, where loving pets are looking for their FurEver home.
A festival would not be complete of course without the Craft Beer and Wine Pavillon. Join Creations & Libations for the after part on Saturday 6:30 - 8:30 for a Glowing Experience.
Check out the Creator Stage (Link To Schedule) where you can see Celebrity makers, Youtubers, and Instagrammers. You can participate in the Fun Craft competitions!
There will something going on everywhere even in the vendor booths. (See Link Here)
It's no secret that I LOVE Cricut®! It all started way back in 2005-2006(?), and I heard about this fantastic electronic die cutting machine named after a green bug! Being the creative and curious, type by nature, and intrigued, I just had to know more! Then, IT arrived in Canada! Armed with every penny, I had scraped up and a credit card I made sure my kids were looked after and drove out to a store in the other province early one morning before the store opened so I could be one of the first to buy one of these Cricut™s in my country. The rest is history.
First. Let me explain what a Cricut™ is and if you are not familiar with what Cricut™ is let me explain with this. Talking about the most current version of the Cricut™ available in the market today, the Cricut Maker™!
The Cricut Maker™ is #1, the "Ultimate" machine out there known for it's cutting performance and versatility. #2, No, other product out there compares. #3, With the myriad of blades available and its #4, Adaptive Tool System™ it performs at a professional level, #5, is expandable, and if using the Fast Mode will cut and write up to twice as fast!
Reason #6, Use the Cricut Maker™ to make the most out of your creative time to cut the most extensive selection of materials from delicate fabrics to matboards, and even leather! #7, Combine the machine's capacities with the more than 500 digital sewing patterns available to make sewing and quilting projects come to life quickly. #8, Or enjoy its Bluetooth® wireless technology to create beautiful paper crafts from the comfort of any room while the Cricut Maker™ does the job in another area!
I 've rambled on about eight reasons alone to love the Cricut Maker™, but what are the other reasons for me to still Love Cricut? More importantly, how do I organize ALL my Cricut Stuff?
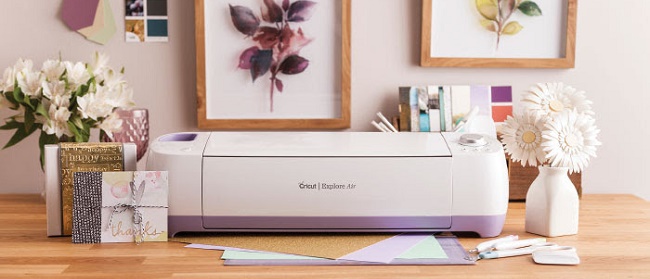
Another five reasons I love Cricut® is ALL The PRODUCTS and TOOLS! To be honest, I probably own the majority of what Cricut makes, as I like them so much. I have told you about the Cricut Maker™ which I own (Thanks to Cricut), I also still own the Explore Air™ 2 (still available),
Which now brings me to talk about Those 10 Cute Ways To Store and Organize My Cricut® Stuff! My motto is A place for everything, and everything in its place!
1. Drawers, Shelves, Protective Pouches, and Labels. I currently store my Cricut Easy Press™ in its own drawer in my studio. I also use a wheeled storage cart when I am using the Easy Press™ and need a little extra working space.
2. Bins, Boxes, and Baskets. All my Felts are stored in one of these bright pink fabric bins that I purchased at a dollar store, and keep in a cupboard. Notice the label?
I use a labeled pencil box for my Cricut pens which I store in the cupboard
above my Cricut station.
3. Hangin it! Short on space? Use any vertical surface such as walls or the sides of furniture and cabinets! Here I show how I use pegboard in my studio and hang many of my Cricut Tools. Including the mats.
Sticky back hooks (especially the 3m Command) at the end of a counter, and along the side of a cupboard make a practical place to hang up those Self-healing mats.
4. A Place for Papers. I store my papers in scrapbook paper holders ( Storage Studios by Cropper Hopper), inside my cupboards. I also write on the spine of the paper pad or outside packaging the name and color of each set of paper.
The scraps are placed inside Vinyl Job Ticket Holders and labeled. Then placed alongside the full-size sheets of papers in the same color.
5. Keeping the Vinyl in View. Now those pesky vinyl rolls are often a challenge to store as they like to roll! I took advantage of the space that is between my cupboards that normally would be covered with a false front or filler piece to have small shelves built. I then stack the rolls of Vinyl there, within reach, in view, but I am sure they won't go anywhere!
6. Cutting the clutter around The Cuttlebug™. Creating with the Cuttlebug™ is a lot of fun, but darn how to store all those Cut and Emboss Diessteel dies, Embossing folders, and the mats? Again I use the drawers I have along with some clear bins and colorful cardboard photo boxes.
I keep parts of the Embossing Folders packaging to make a holder and place to organize each folder.
7. Magnetic sheets for Cuttlebug® Dies storage. In order to keep all the different steel dies that can come in a set, I find it safer to keep them together by sticking them onto magnetic sheets which are labeled and inserted into a plastic sleeve. (Video soon)
8. What about those Cricut® Blades, and housing, etc. Ahh, the more I use my Cricut Maker™, the more blades, and housings I want. To me, this has been the most challenging of all the Cricut tools to organize. My latest system consists of small plastic storage tubs from the dollar store, a wire basket, more labels, and my trusty pegboard!
9. The BrightPad™ has a specific spot too in my studio, tucked away in its cozy felt pouch that I Designed and created. I tuck it in a spot under my desk so it is easy to grab whenever I need it for tracing at my drawing desk, my counter for illuminating a specific and detailed project, or for weeding vinyl after cutting on my Cricut Maker™!
10. Cricut® Bags and Totes for on the go creating or at home storage. These totes are not only beautiful but they are so practical and makes traveling to and from events or vacations a breeze.
Use these totes for storage at home especially if your space is limited and you need to store your supplies once your making session is done. Look stylish with these classic looking totes too wherever you go!
I hope that you found at least one tip useful in my long list here. Thank you for stopping by.
Stay Crafty!
POST DISCLAIMER
This is a sponsored conversation written by me on behalf of Cricut. The opinions and text are all mine.
READER COMMENT DISCLAIMER
Comments submitted may be displayed on other websites owned by the sponsoring brand.
This is a sponsored conversation written by me on behalf of Cricut. The opinions and text are all mine.
Cricut sent me some New products for the sponsored posts I make for them, and I am very excited to create and share more Cricut How To's with you!
See it all here:
Cricut sent me some NEW to products to use with the Cricut Maker, Explore Air, and Cuttlebug for more How To videos for your crafting. Cricut is my sponsor for many of the Cricut Videos that I make. All opinions expressed in this video are my own.
Affiliate Links (That pay me a little bit if your buy, Thx!)