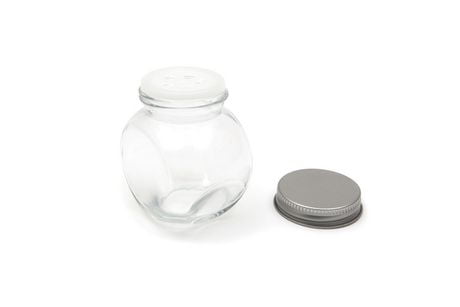
Turn some ordinary jars into the cutest craft storage for your own supplies, just like I did. All you need is, a jar! Ok, I also used some Etching Creme by Etchall®. A completely new to me product and craft. If I could learn how to use the product and create within half an hour, so can you!
To begin I followed the instructions that come with the Etchall® Creme, and I viewed the video on how to work with the product. It is so easy! I was so excited to say "I can etch glass now!" I know, this girl gets excited over the smallest things. LOL.
So what is this Etchall®? It is a product that you just use on a glass surface (as well as other surfaces) to actually etch a design, which gives you this sort of frosty look. All you need is a hard non-porous surface (glass, mirror, tile, slate) that you want to alter. A stencil made from a very sticky vinyl, and the Etchall® creme. Note there is a liquid version of Etchall® too meant for dipping.
To make my cute button jar I used a paper punch I own and a piece of the vinyl, and a piece of the transfer film from Etchall® to make my very own special stencil.
It is important to make sure that the glass surface is clean before beginning. I used some rubbing alcohol and a clean lint free rag to prepare the glass. Then, I applied the vinyl stencil sticky side down on the jar, making sure that there were no bubbles. To help with that there is a great little squeegee type of tool available from Etchall®.
After the stencil was applied, it was time to add a generous amount of the Etchall® creme. The coolest thing about working with the product is that it is reusable! So, your investment goes a long way. After 15 minutes you just scrape the product back into the bottle. Once the jar was rinsed under warm water, the stencil could be removed and discarded. The results were surprisingly good for my second time playing with the Etchall®!
For many how to's and more creative ideas please check out all of the Designer's involved in the hop, and remember to check out Etchall® at the following places.
Thank you so much for viewing, please leave any comments, questions, suggestions below and I promise I will read them all!
Take care and stay crafty!
Here are some affiliate inks I made for you just in case you wanted to purchase these products right away! If you do buy from the links I do make a small commission, so thanks!
Do you like mysteries? How about saving money? Maybe you just want to craft? Ok, well I have something to share with you that will fulfill all three.
The latestCricut March Mystery Box #3 - Supplies is going on sale tomorrow for $34.99!!! I don't know what is in it, but I do know that it's some pretty good supplies!
I have recently had the pleasure of becoming a Brand Influencer with one of my all time favorite companies, Cricut! I am so delighted and excited to begin this journey with them, as I have been one of their longest fans. I fell in love with the very first Cricut years and years ago when the first one was made available and sold in Canada. I remember going to Zellers (now defunct) to purchase one of the very few Cricut machines that the store had advertised in their weekly paper flyer! I wanted that baby so bad, my sons remember that day very well, and remember the joy we had learning to create with the machine. My boys were little at the time and enjoyed helping mom to press the buttons to die cut some cute and fun die cuts to decorate our scrapbooks, make cards, and just plain have fun. Fast forward to 2017, and my now young adult sons are thrilled for me as they know how much I have enjoyed playing with ALL the Cricut machines I have purchased over the years. That's right; this is not my first Cricut. However, I can honestly say that receiving the Cricut Explore Air™ 2 machine from the company as part of working for them has been a very exciting moment for me. I still own and will keep my original Cricut, if only for sentimental reasons.
So, what is a Cricut you may ask? Cricut Explore Air™ 2 machine is a smart cutting machine that will help you make your very own personal, and high end looking projects with ease. The Cricut family of tools allows you to cut, and create projects for your home decorating, parties, events, your clothing, and so many projects.
Think of it as having a printer that also cuts. That's right, with a Cricut Explore Air™ 2 machine not only can you die cut, but you can also draw, write, print on all sorts of flat materials from papers, vinyl, fabrics, thin veneers, chipboard, etc.
Do you like having customized home decor? Do you admire all those beautiful party decorations you've seen at events? Would you like to be able to say "I made this? But, do you also think to yourself "I am not creative, and I don't have the time to do these things!" Well, I am here to tell you that a Cricut Explore Air™ 2 machineCricut is the perfect and affordable tool for you. It is so easy to use, that even the least creative person will become a DIY' r in no time. All you need is the desire to want to make something special.
Perhaps some of you are wondering why I have upgraded over the years, and why I so am in love with the Cricut Explore Air™ 2 machine? Simple, in my opinion, it's the fastest and easiest of all the machines ever that Cricut has made. It seriously works twice as fast as the Cricut Explore Air, I know I have tried both. Is it faster than the original cricut? Well, of course, it is! And it is quieter. The machine also takes original cartridges, which you can upload onto the Cricut® library in My Cricut Craft Room.
If you are reading this post or viewing my video, then you already can use a Cricut® and its software which is available online. Upon purchase of any Cricut®, there are instructions included as to how to set up your machine and the software. You can do so wirelessly, or by connecting directly to your desktop, laptop, and devices.
In future posts I will share with you projects I have made using the Cricut Explore Air™ 2 machine Cricut® Explore Air2. The very first project I made, right away, was a simple Thank You card.
I hope that you come back and see how you too can do a similar project.
Thank you so much for stopping by, and stay crafty.
This is a sponsored conversation written by me on behalf of Cricut. The opinions and text are all mine.
How to make an easy, fast, and inexpensive Teacher's or Colleague's gift for St. Patrick's Day. Since everybody (well a lot of people) like to say they are Irish even if they are not on this day, here is a quick project you can make in a short amount of time. Give this and celebrate!
The Lucky Leprechaun Hat was inspired by the generous gift of paint by Rust-Oleum. When I first received the cans of colorful , and eyed the luscious green spray paint (Gloss Rich Jade) I immediately thought of Leprechauns and St. Patty's Day, and Luck!
To do the project, here is what I did.
I took a small terracotta pot (I chose it because of the wide brim that looks a bit like that of a hat), spray painted it with Rust-Oleum Gloss Protective Enamel in Gloss Rich Jade, and let the paint dry.
To imitate the sash on a Leprechaun's hat I cut a piece of gold colored cardstock to size, made some slits and slid a piece of black ribbon through the "buckle." I used a dab of hot glue to secure the black trim to the "Hat."
I cut a piece of floral foam to insert into the pot and used some hot glue with my Ad Tech Glue Gun to secure the block.
With some more glue, I covered the foam and filled the gaps with the shredded paper (or Easter Grass).
I chose some foam clovers, adhered them to each pencil with some more hot glue, and poked the pencils into the floral foam.
I added a bit more glue and "Grass" to cover the holes.
To finish off the Lucky Hat, I glued a few gold foil wrapped chocolates in the "Grass."
Shop DollarTree.com to get all of your St. Patricks Day decorations for only $1! Many of the supplies I used to make the "Lucky Leprechaun Hat" came from the Dollar Tree and hauls I did (here is the Haul video ) link here.
How would you like to see some behind the scenes pictures of the new products hitting the store shelves this year? Well, I went to the Creativation Conference and Trade Show (Formerly CHA). And in NOW re-branded to AFCI (Association For Creative Industries) which happened in Phoenix Arizona in January.
I can tell you that there is a lot more Makers, DIY'ers, Crafters, etc. out there than we know. It is an excellent time to be a hobbyist or a pro. Companies are coming up with new products and product lines all the time. New businesses have joined in too.
So here are a few pictures and even a link to a video where I share one company's products. If you just can't wait to find these products, you might want to check out the links to my Affiliates in the sidebar. Purchasing from those links will recompense me with a small sum of change. Thank you.
There is lots more to share. But that will be in other posts.
Thank you for stopping by.
*note I am affiliated to Cricut and will be compensated if your purchase from this link.
Hello, today I am sharing another Heart Themed craft I created as part of the #LoveArt for the YouTube Creators CAC - Creative Arts Collaboration. See my video below and others in the same theme by using the #LoveArt when visiting YouTube.
To make this wreath I used supplies I bought at Dollar Tree, and Dollarama. Creating does not have to be expensive, it should just be expressive.
The supplies I used include:
Heart Shaped Wire Wreath
3 balls of yarn
Hot Glue and Hot Glue Gun (AdTech)
Felt Hearts.
I just tied the three strands of yarn to the wire form and wrapped that frame until it was completely covered. I adjusted here and there to hide all the wire parts. In the end, I just cut what was left off the yarn and tucked in the ends into the wreath.
I completed the wreath by gluing on some felt hearts with some hot glue.
For my fellow USA viewers if you wish to order related supplies online from Dollar Tree there is a convenient link provided for you to the right. Clicking and purchasing from any of those ads in the sidebar will mean that I will receive a little financial compensation. So thank you in advance.
Making Art is essential to the well-being of my Heart. Nothing brings greater pleasure to a Maker than to create joy for someone else. During the Creativation Trade Show, which took place in Phoenix Arizona January 21-23, Designers participated in the Heart Art RAK (Random Acts of Kindness) event on a Sunday morning. I, along with many fellow Designers volunteered to create some pieces of art with Hearts as the theme, which we then left in the public spaces on the Trade Shown floor for others to find. Our hope and intention were just to bring some joy to random people.
I created these two pieces:
I know that one of my pieces which were found and claimed by individuals who then shared it on social media. It warmed my heart to know that some small piece of art that I made could bring happiness even if only for a brief moment to someone. We have since become friends on Facebook, and I hope to retain that friendship for a long time.
To make these small Heart Canvasses I used some bright acrylic paints, and utilized a variety of techniques. Here is a glimpse of that process:https://youtu.be/sLgQxdsPHG8
While the paintings were drying, I added some sprays of colors onto the white based wicker hearts. A tip I have for you is to remove the lace before spraying, so it maintains its whiteness. I also added some glitter to make the hearts sparkle. Once everything was dry, I used hot glue to adhere the hearts to the canvas.
Supplies:
2 x 3inch square canvas
Fluid Acrylic Paints (DecoArt)
Wicker woven Heart (Dollar Store)
Ink Sprays (Tattered Angels)
Hot Glue (Ad Tech)
Here are links to purchase similar products online. I am affiliated with these sites and will receive just a lil' bit of money if you purchase from these links. Thanks.