
The first step I recommend is to assess the space you have to craft in. Every area will have the limitations of its size no matter how big or small. By the way, bigger is not always better.
What are the limitations you have? Can you work in the same room as where you store the majority of your materials and tools? Or do you need to make do and think portability? Do you have an alternative storage area(s)? Consider how you work, and what you like to make. For example, are you primarily a paper crafter? A painter? Sculptor? Sewist? Perhaps like me, you want to dabble in everything!
If you have to store your materials in one location and be a portable maker, for example, you travel to crops regularly. Or you tend to craft at the kitchen table whenever it is not being used by the family. Then you need to store your materials in a spare closet, dresser, or under the bed! You might need a mobile and portable storage like the Unique Creative Fold Out Sew & Craft Tote Black
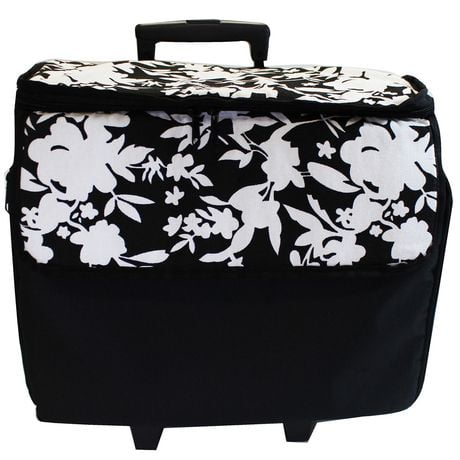
Pretty tote seen on Walmart.ca.
I have both portable and stay in place needs. So I actually have doubles of specific tools in totes packed and always ready to go.
For the Stay, in place, crafter here are my recommendations.
#1. Assess your space
#2. What do you make and How do you work
#3. Like with Like
#4. A place for everything and everything in its place
#5. M.I.S = More in Storage System
Assess your space. Take a look and take measurements if need be of the area you will be working in. Maybe you are fortunate enough to have an entire dedicated area or even an entire building for your crafting! Perhaps you have a closet that you can convert. No matter how big or small that space is you will benefit from taking the time beforehand to assess just how much space there is and how you can best utilize that area. Remember to look up and don't forget to look at the vertical space too. So much can be done to a bare wall! Wall space is great for shelves, pegboards like the Azar Displays 900945-WHT Pegboard Room Organizer, White Pegboard
What Do You Make, and How Do You Work. Knowing ahead of time what crafts you are interested in will also help in your assessment of how to best use that expensive area! Remember to also consider how you will work on your masterpieces in this space. Are you the type of crafter who prefers to stand, sit in a chair. Are you comfortable on a bar height stool and working off a counter, or a wood easel
One of my two favourite mantras is: Like with Like. That means I like to keep the tools I need for the activity they are intended for together. Just like in my kitchen, I keep the bowls, measuring cups, rolling pins etc. in the same are in my kitchen as these are my tools for baking. In my studio, I keep all my paintbrushes close to where I have my easel and paints.
A Place for Everything and Everything in its Place is my second most used sayings! My family hears this one very often! My goal for this is that by living with others and sharing in the tools and supplies to run our household, it makes a big difference to the person who needs to use let's say the scissors, to be able to find the scissors where they are intended to be kept when not in use! To me, it's a simple system. I apply the same logic in my studio, even though most of the time, I am the only person crafting there. I still find myself to be more productive when I can just grab whichever pliers, rulers, or paintbrush I want to use if I always put these items back where they are supposed to be kept when not in use!
 Finally, there is my M.I.S system, which I coined and refers to More In Storage. The More In Storage System I created for my own pleasure was born out of the need for me to keep only a limited amount of consumable supplies with my immediate working area to be used almost daily while maintaining a right amount of extra supplies on hand but stored in a different city. Having this system allows me to have a greater variety of supplies within my current studio space, without feeling overcrowded with all my tools, and ALL my supplies in one room. For, if I were to store everything I own for my crafting, I would not have any space left over to actually work in.
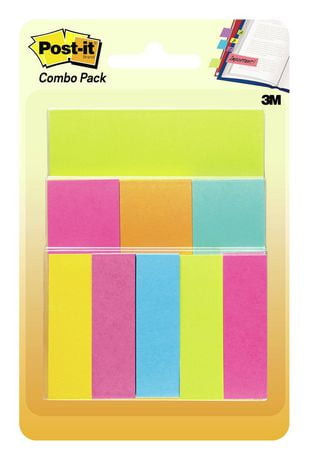
So, how does this M.I.S system work? Let's say that I buy 3 packs of 12 x 12 Black cardstock because I know I used this supply a lot, but I also have an opportunity to purchase a larger quantity making each sheet much less expensive because of the buying in bulk. What I do is I chose to keep perhaps one package in my studio. I will add a 3M Canada Assorted Pastel 3X3 Size Sticky Notes Assorted Sizes
Keeping track of what you have is also an essential component of having an efficient organization system. Such a system need not be complicated, however at least having an idea of what one owns does enable the maker to save money, time, and space.
By keeping an inventory of what already exists in the crafter's space and in the alternative storage the crafter can safely go shopping and spend her hard-earned money only on tools and supplies that she does not already own and that will be a positive addition to craft tool kit!
There are many ways one can keep track of their items. Some prefer to go the digital route and keep track of their collections with apps such as Evernote or even have spreadsheets. If that works for you, then go right ahead and do just that. Maybe you prefer to have a written list of what you own. Whatever makes you most comfortable is the way to go. Another way some crafters keep an inventory is through pictures that they continue on their smartphones, All of these are large systems that can all easily be adapted to suit the crafter's preferences and needs.
Currently, I use what I like to call my Catalog system.
The Catalogue System I created is simply made of several Hilroy Ultra Heavy Duty Binders, 1", 11-1/2 X 10-3/4 with tons of Pen+Gear Sheet Protectors

The most massive catalogue is the Stamp Catalog that holds images and details about my entire stamp collection. It includes the rubber and wood mounted, clear acrylic, cling, foam, and handmade stamps. I have an extensive selection, so having 22 categories makes sense to me!
1. Alphas, Numbers, Punctuation
2. Animals
3. Backgrounds, Borders
4. Celebrations, birthdays, Stars, Games
5. Floral, Nature, Suns, Scenes
6. Food, Beverages
7. Frames, Shapes, Flourishes
8. Love
9. People, Kids, Mermaids, Fairies, Other Characters, Clothing
10. Sentiments
11. Travel, Postage
12. Vintage
13. Winged Creatures
14. Creativity
15. Stamps with Dies
16. Micro, Washi, Other
17. Sports
18. Homemade
19. Planner
20. Christmas
21. Easter
22. Halloween
Secondly, I have a Tool Catalog, which includes everything I consider to be a tool and only need to have one of each. It is not the same as a consumable supply. There are 6 sections.
1. Stencils (note this may be moved to a separate binder)
2. Dies
3. Dies With Stamps
4. Punches
5. Embossing Folders
6. Brass Stencils, Rubbing Plates
The third binder is the Catalog of Colours. In that, I keep track of swatches, and samples of all of my consumable types of tools/supplies that create colour. There are 9 categories, and I may add more in the future.
1. Colour Families (Reds, Oranges, Blues, Neutrals, Purples, Greens, Metallics, Yellows)
2. Colouring Pencils
3. Pastels
4. Ink Pens
5. Paints
6. Ink Pads
7. Sprays
8. Other, Glitter, Embossing Powders
9. Washi
Finally, there are the paint swatch charts that I keep in thick plastic pockets. These prove to be very useful during painting sessions, especially when I want to match paints in their true colours.
I hope that you are inspired to create your very own organization system, and find more time to craft.
please, return for future posts in this series and see in detail how I use my systems in my own space over on Youtube.
Thanks for stopping by. Stay crafty!
No comments:
Post a Comment